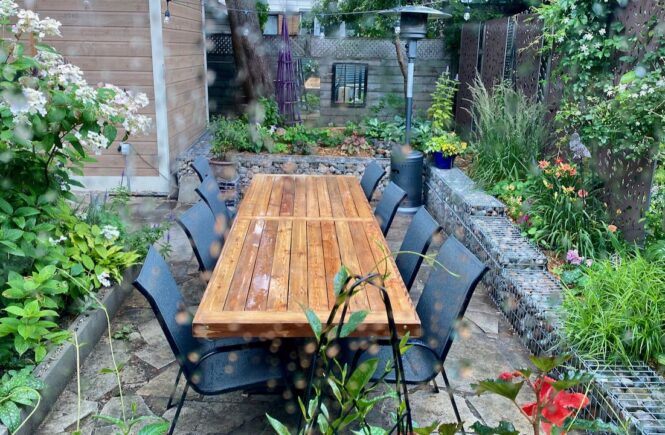
When visitors see our garden renovation, one of their first positive comments is about the gabion retaining walls. We agree. For high design impact at low cost, the gabions – the stone-filled wire baskets shown above from our window on a rainy day – were among our most satisfying decisions.
Other options for the garden walls ranged from cheap (cementing the old limestone pavers that gravity once held perilously together) to expensive (st
andard preformed concrete blocks). The gabions were affordable, and combined design flexibility with idiot-proof – if labour-intensive – installation.
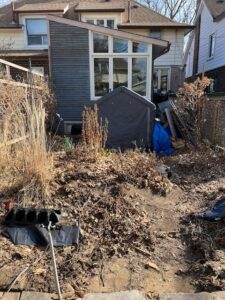
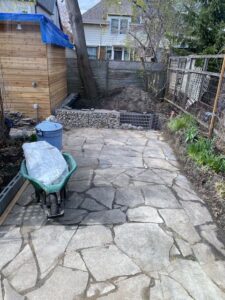
But first, we had to pave the area they’d sit on. Once filled, they’d be heavy. Here are the “before” pics.
We had to swap things around. From the back of the driveway where our new shed would go, we had salvaged a stack of old pavers. The new shed used a different foundation. Then, to enlarge the patio area, we had to relocate a garden bed to the former site of the old shed.
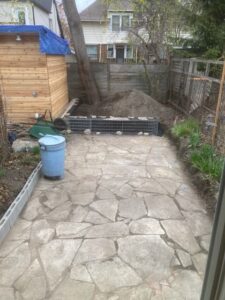
Now we had space for a larger patio. The area had to be graded so that any rain wouldn’t run towards the house. A laser level and staked line of string guided the adjustments. Where change was restricted by the remaining driveway, we sloped the grade into the garden and away from the building.
With this done, we could prepare to pave. Using a flat-bottomed tamping tool, the cleared, graded earth was pounded firm. Gravel was added and pounded again. Then, like a heavy jigsaw puzzle, the patio was built using the old pavers, with gritty sand swept between to lock the stones in place.
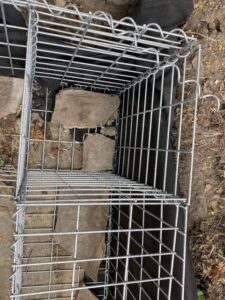
The basket kits, which we ordered from Gabion Canada, arrive flat-packed with separate sides, tops/bottoms, ends, and spiral fasteners. We bought two sizes (all sizes in Imperial), 20″H x 12″W x 40″L and 12″H x 12″W x 40″L – more on sizes shortly. After filling (3-6″ river stone; an inexpensive choice), the top shuts with spirals fastening ends and sides. The spiral fasteners can potentially be undone to add stones if things settle.
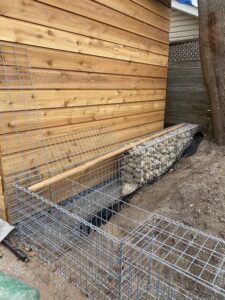
Starting in the back corner, the wire gabion baskets were cut at the base to fit around the roots of the maple tree, but keeping the tops level. The tree already sat at the height planned for the new back bed. The stones arranged in the cages leave large gaps for air.
The system is fairly forgiving. To extend the basketwork by one foot, for example, we created a square corner piece
(above right) by setting a short basket on its end. A close look at that photo might reveal the difference in the direction of the wire rectangles. Those odd bits of paver at the bottom were too-small leftovers that padded our river stone, because we feared we might run out.
We did run out of stone for a while, and
had a long wait for materials. When it arrived, it was unfortunately the wrong size – too small not to fall through the holes in the baskets. That put the project on hold for several weeks, but Mr. TG had plenty of other things to occupy him. Expanding the deck, for instance, moved up significantly in priority. In the end, we’re glad it did.

Again, wire cutters let us snip off a row and attach it to the top of the shorter basket to create an in-between height that stepped down to follow the slope of our our long, side bed. Because we didn’t have time to think about planting design, that bed stayed pretty much as before, with some plants randomly plonked in bare spots so they’d have a chance to survive. We’d think about them later!
Landscape cloth lined the garden side of the raised beds to prevent soil infiltrating the stonework.

We’re very pleased with the result. I love the feeling of sitting in a sunken garden. I love the garden benches we added on top. I find weeding (using a padded kneeler on top of the gabions) to be easier than ever. And though I love many other
aspects of the gabions, there are a couple of things to note.
Every single stone had to be hand-placed by someone; two-thirds of the time, that someone was me. In total, about four tons of river rock! Gabion fronts and tops got most of the attention, selecting the better-looking rocks with the larger near the base. Paying someone else to do it would have been costly.
And while I’m hoping I can introduce plants into the rock work, I’m also hoping that unwanted plants won’t dig themselves in to all those nooks and crannies.
Time will tell! Do come back and see.





10 comments
Love the look and I’m enjoying this detailed series!
Thanks, Loree, and good to see you here. There are a few more stories to tell, so please come join us again. Wishing it could be in person!
That’s a wonderful transformation. So well done–looks professionally done.
I looked into gabions myself but at the the time at least 10 years back, the cages were quite expensive.
Thanks so much! What a compliment. The gabions and stone cost us about CDN$35/linear foot, which would be under US$28/ft. For an interesting stone product, we figured it might be at least twice that cost – given added labour, because that would be beyond our DIY abilities. The cages themselves represented about 2/3 of that. Is that in line with prices 10 years ago?
Fascinating project and I noticed you used “gritty sand” between the pavers. Can you describe it further – what do I ask for from a supplier? The sand has been blown out from between the stones in my front path by overzealous landscapers and been replaced by despised liverwurts.
Sally, you’d look for coarse sand. If you tell the supplier what you’re using it for, they’ll suggest the right product.
A lot of labour for sure-have your hands recovered? It looks great and feels like cottage country!
Thanks, Jessica. It feels like cottage country to us. My hands recovered fairly quickly. My back was another issue. I joked afterwards that I was walking around like an old woman. Then I realized: Wait. I am an old woman!
Helen that is a lot of work indeed but it looks amazing .. and to know you did it (without throwing your back out completely ?!) now what an accomplishment that truly is ! Well done you ! … Enjoy your fruits of labor and I can’t wait to see what plants you incorporate !
Labour of LOVE. You did a awesome renovation years of enjoyment. If friendly snakes sun baths welcome them… They keep mice n bugs in check.. Thank you for sharing your project with all of us..