You’re looking at a greenhouse. No, actually, you’re looking at many teeny tiny greenhouses. Or, they will be, once we get through with them.
My Number One Dot and I have embarked on an adventure in winter seed starting, inspired and informed by the Garden Faerie blogger Monica Milla and Montreal garden blogger Dirt Gently. Links to them in a minute.
I normally have two problems with seed starting indoors. One: I live in a small house, too full of people, and without room for things like grow-light stands. Two: I have been known to kill almost any indoor plant, except for those that thrive on abuse.
Winter sowing sounds like the perfect solution for someone like me. It doesn’t take up any room indoors. And, after a few easy steps at the start of the process, they require minimal monitoring… until the weather heats up. This year, I have my NOD at home to aid and abet.
Our how-to guide was Monica Milla’s excellent 36-page booklet Fun with Winter Seed Sowing. Any container can work as a mini greenhouse, assures Monica, as long as it’s translucent or can be fitted with a translucent lid. In our case, we harvested a basket full of 2L pop bottles from neighbours J and R. They needed to be washed (the bottles, that is; J and R are scrupulously clean) then sterilized by soaking in a bleach solution. As we had lots, we soaked them in the bathtub.
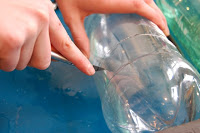
We then drilled drainage holes in the base. Monica suggests using a corded (not cordless) drill for greatest power. However, Mr. TG being high-tech in the tool department (ahem), none of our drills have cords, and the rechargeable didn’t have the oomph for the job.
In the end, we found my crafty NOD’s Dremel to be the handiest for making hole
sional cialis online www.sip.sal.edu.in/wp-content/uploads/2024/08/jpg/professional-cialis.html no prescription pharmacy
s. It was a snap.
At first, we drilled holes in the bumps at the base, but then thought that as the bottles sit right on these it might impede drainage. So we added holes in the dimples in between. If that ends up being too free-draining, we’ll close some of the holes with tape.

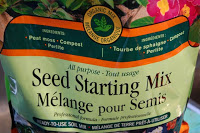
Meanwhile, we’ve been moistening the potting soil with warm water. We selected a soil mix with compost, peat moss and perlite. The peat (which can hold up to 20X its own weight in water) helps retain moisture, and the compost provides soil nutrients for the seedlings.
Opening the package released a waft of earthy fragrance, which I paused to breathe it in. Ah, Spring! After a few light sprinklings of water, and a good kneading, with an hour or so for the water to be absorbed, the soil mix had that “crumbly as chocolate cake” quality. It was moist enough to clump together lightly when squeezed, but wasn’t soaking wet.
We added the soil to a depth of at least 5 cm/2″ at Monica’s recommendation. In three of the bottles, we used cardboard toilet paper rolls, cut in half, as our plant “pots,” soaking them first in water. In the remaining bottles, we simply placed the soil in the bottom of the bottle.
Here’s what we planted – deliberately selecting seeds for veggies that would typically be started indoors:
Tomatoes, an Italian type called ‘Cour di Bue’, a black tomato called ‘Pierce’s Pride’ and ‘Aunt Ruby’s German Green,’ all from Baker Creek Heirloom Seeds; as is the ‘Purple Beauty’ pepper.
From Botanical Interests, a cherry tomato called ‘Sugar Sweetie,’ a ‘Japanese Soyu’ cucumber, and ‘Parris Island Cos’ romaine lettuce.
We are also trying ‘Lemon’ cucumber from Irish Eyes Garden Seeds whose slogan is “Short Seasons Seeds for an Early Harvest.”
After planting, and marking each set with a Sharpie (hoping it won’t fade), we sealed the cut edges of the bottles with clear duct tape – using multiple shorter pieces to make partial ventilation a little easier when the weather warms up and requires it. Then outside our mini greenhouses went to the back porch.
We’ll keep our eyes on them to make sure they aren’t blown over or don’t dry out. If the soil starts to look too light in colour, we can add water through the hole at the top. Condensation on the inside of the bottle is a positive sign that things are chugging along as they should.
Monica assures us that the seeds will remain dormant till Mother Nature wakes them up. The NOD and I are extremely excited about our babies.
You can buy Monica Milla‘s book though this link. It’s very good investment, loaded with info.
And this link takes you to the first installment in a 3-part Wintersowing Saga, with more how-tos and photos, by Montrealer Dirt Gently, who is considerably more adventuresome than we’ve been when it comes to plant varieties. So far, at any rate. We still have sterilized bottles, soil and flower seeds that might be given a go. Stay tuned.
 |
| Finley keeps an eye on our bottles, watching for marauding squirrels and other critters. |


6 comments
Hi Helen, You have no idea how much it tickles me to read about your adventure. Whenever I teach/speak about winter sowing, I always tell people to send me photos and let me know how it went. They never do! So it warms my heart you tried it and found my writing helpful in your endeavor! Also, while I don't make a big deal of it, orange cat helpers are indeed very helpful in winter sowing! Here in Michigan, we have a pop bottle deposit law, so no one is using those are mini greenhouses, but it's always nice to see them used elsewhere for winter sowing. I'm looking forward to reading about your progress. Here, my tomatoes sprout at at the end of April. 🙂
I'd worry about them blowing away. Clearly it will work though – a Monica-tried-and-trusted method.
Esther
Esther, I'm not the inventor of winter sowing, I just do it. I've never had problems with stuff blowing away–whether set on the ground or on a shelf.
These are great instructions and a wonderful project. I too thought about them blowing away since we just had 55 mph winds last night. Good to know they stay put.
I have Monica's book and think it a splendid how to guide. Your post shows how really simple it is to do. Finley is gorgeous. gail ps I don't do houseplants either! I just seem to not think about them.
I have promised myself to get back into working with seeds this year. To that end I bought some 40 interesting seeds – trees, shrubs, annuals and perennials – not to mention herbs – from a South African supplier I discovered. Watch this space… Jack